 Live Music Archive
 Librivox Free Audio
 Metropolitan Museum
 Cleveland Museum of Art
 Internet Arcade
 Console Living Room
 Books to Borrow
 Open Library
 TV News
 Understanding 9/11
tv CBS This Morning Saturday CBS February 2, 2013 8:00am-10:00am EST
8:00 am

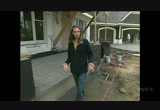
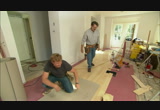
♪ >>dean: hi, welcome back to hometime. well the question is what gives a house "curb appeal"? we're going to explore that today on hometime. >>miriam: yep. we've been tracking the street view elements on this new home under construction here. that'll include roofing, natural stone stamped concrete and garage doors. >>dean: so by the end of this show, we should have a pretty good idea of what this home's curb appeal is all about. >>miriam: yep. i hope you can stick around. ♪ >> got a new guy. >> well it's about time.
8:01 am
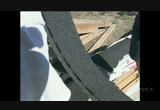
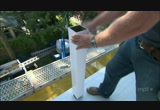
>> where's the gig? >> gmc. proud to lend a helping hand to hometime. ♪ >>miriam: one thing we want to do is show some of the details going into the deck and the screen porch out back so we'll visit that part of the construction as things come together here. but let's focus right now on what's going on out front. as we start our porch roof, we're going to be using the same material as we're using on the rest of the house roof. the main element is this dimensional shingle. there are a few other things in this system that you should know about. the first is a leak barrier. this is going to go over the most vulnerable parts of the roof. and then we'll have our roof deck protection which is going to go over the rest of the sheathing. the guys are using an underlayment that's reinforced with fiberglass which is a lot lighter than conventional felts or tar papers so there's more roof protection on each roll. here's what they're using to cover the membrane and the underlayment. this is a fiberglass asphalt shingle and it has kind of a layered look to
8:02 am

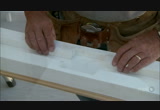
give it a more dimensional look up on the roof. this particular color blend is known as midnight blush, and the overall effect is going to be similar to traditional slate but at a much lower price. each one is 17x40"s so they're going to on pretty fast. and even though the shingles are the most prominent element at this stage, there are a couple of other important ones we should talk about as well. mike schrader is here with his crew to get us started here. now i know the starter strip is pretty important at the beginning. you want to talk about how these guys get started? >>mike schrader: sure. the starter strip goes down first of course with the desired overhang of the shingles depending if there's gutters or extra fascia. it's a factory made starter. it's not made out of a shingle. the perforated produce comes bundled up in two and you break them in half along this edge. the sealant strip goes down at the bottom as to seal to the back side of the first course of shingles. all the edges are straight and square which makes it kind of nice. you're not working with a hand-cut edge. >>miriam: as far as the layout with a roof like this, how do
8:03 am
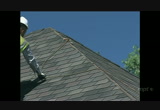
you go about laying it out? how do you go about putting them up and stuff. >>: first of all what we do is we determine the exposure of the shingle. this is a designer shingle. it has a larger than normal exposure. in his case we'll snap our horizontal lines 8"s per course. from that, we'll jump over to a vertical line. and this has a 10" wide path so you split that in half into a 5" offset or a step pattern to gain a stair style starting point. from that point, we use a full shingle and we can just follow them up and it moves pretty quick after the starting process. >>miriam: so the purpose of it going up at a diagonal is? >>: mostly it's a color blend. shingles nowadays are blended. they're not solid colors. and if you don't run them up according to the manufacturers' specifications, the colors will clash. they want to have it broke up a little bit so it doesn't clash on one side or in clumps. they're a good shingle. rigid enough to work with. really they don't flop around on you. good shingle. >>miriam: and what about the ridge? how do you deal with the ridge? >>: the ridge cap is a perforated product not made out of the shingles anymore. these
8:04 am
are double thick shingle product. gives it some extra life. and they're perforated. there's 3 per piece. and basically what you do is you fold them each way just to crack that perforation loose. couple of times if they're hot. and pull them apart like that. and when you apply them, of course you snap a line down one side of the ridge or the hip whichever you're applying them to so you can get a straight edge. and then there's 2 nails per side. and there's a sealant strip on the bottom so it will stick to the one that you laid it on top of so everything is sealed down. everything is to prevent wind blow off of some sort. >>miriam: exactly. so what can somebody expect from a roof like this? >>: very low maintenance. an asphalt roof especially with a designer shingle like this that is now considered a lifetime shingle, it shouldn't have any problems from leaking or shingles blowing off because of all the extra sealants that's on the bottom of these shingles right from the factory. this
8:05 am

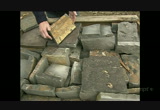
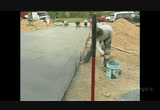
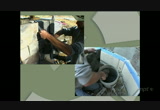
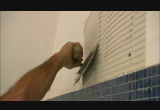
should be a problem-free roof for quite a while. >>miriam: well they're getting a great start especially considering we've had some iffy here and there. so thanks so much for your help. we appreciate it. >>:thank you. you bet. >>miriam: after roofing comes the siding, and for this home it's a combination of lap siding and shingles but both are in the form of fiber cement. the shingles are actually 4 foot panels that give you the look of cedar but with a lot less maintenance. it can be prefinished in a variety of colors but the plan here is to paint it after installation. the next thing to go up on the house is going to be the stone out front. now they're using a natural material known as "quartzitic sandstone". it's quarried in oklahoma. and this is a thin veneer format meaning it's about an inch thick rather than the 3 to 4"s of a full veneer. but the front porch, steps and sidewalk have to be poured before starting the stone. so that's being done today. the guys have already prepped the forms, gravel and
8:06 am
rebar for a stamped concrete treatment which should be very interesting because they're adding the color right on site. >>bryan cipala: we're basically forming up our porch here in anticipation that the stone, thickness, mortar and elevations are all at one particular height for them. >>miriam: well the way they have these all set up, the concrete is going to come right over the rigid foam insulation so when they take off the forms, it's going to create just the right spot for the stone veneer that's going to be going on later. >>: basically the installation is serving as a void for the stone crew that's going to be coming in behind us. we'll have a nice overhang about 2-1/2"s around the perimeter of the step and the porch. they'll come in behind us, insert their stone underneath that 2" overhang. >>miriam: now here's the color and texture that they are going for. the color is a blend of 4 different pigments that they put in a dissolving bag and then they put it this bag for shipping. so when the concrete truck arrives, they just take out the dissolving bag >>: we'll just throw those in
8:07 am
and we'll get it mixed up. >>miriam: toss it into the concrete truck. as it mixes, it works it's way into the mix and you get the color that you want. so bryan ... >>: yes. >>miriam: i have a question. i know you're really busy but for people who may not be familiar with stamped concrete, do you want to kinda go through what happens when you do it? >>: ahh, yeah. basically the concrete will show up. we'll be adding the color to the truck that we'll be mixing for anywhere between 8 to 10 minutes. and then we'll just start pouring out the concrete from the far end all the way to this end. the process is the same as traditional gray concrete. we will lay it down. we'll smooth it out. make sure it has a nice crisp look to it. >>miriam: it's a little bit muddy out here today but the guys are glad that the truck is able to back right up to the porch. it's a lot easier than carrying all the concrete by buggy. i know with the aggregate that you're working with that could be varied. so what do you use for this treatment?
8:08 am

>>: this particular application we have a 6-1/2 bag dampable concrete mix. basically they eliminate a lot of the aggregate rock and put in more sand. so you get kinda a more fine finish and a more crisp look with your stamp when you stamp it. >>miriam: it's always a good idea to agitate the concrete a little bit to make sure there's no voids or air bubbles and make sure that the concrete fills every nook & cranny. how do you finish the concrete before you spread the release agent and then apply the stamp? >>: well we'll be finishing the concrete - trowel finishing it to take out any imperfections, any voids. making sure that the concrete is totally level so the impression of the stamp looks uniform as the stamp impression is being installed. >>miriam: i think we'll talk about concrete curing rather than drying that's because it's a chemical process. it's what makes it hard. sometimes it can take days even weeks for it to fully cure but it can get pretty hard to work with pretty quickly so these guys work as fast as
8:09 am

they can. >>: here we have a decorative edger from 7"s from our outside form in, we're going to have a nice 7" border going around the perimeter of the porch. the outside perimeter of the border is going to be stamped with roman slate. and on the inside of the porch, it's going to be ashlar slate. so you have 2 different stamps going on but there is a visual there that kinda complements each other when it comes to the 2 different stamps in the area that you're stamping. basically the border is there. it just kind of dressed the inside of the work up a little bit. >>miriam: and then this is kinda part 1. you're going to do the porch and then the walk and the driveway you're going to come back for, right? >>: that is correct. you know, if you could control a smaller portion of concrete when you're stamping it, you have a better end result. after we have it installed and have it fine-tuned in and finish, then we'll start placing our secondary color that we'll be broadcasting across the top of the concrete that we laid. it also provides us a bond breaker between the concrete and
8:10 am
the stamp so the concrete doesn't stick to the stamp. >>miriam: how do you know when it's actually ready to start stamping? >>: ahh, it's kinda an instinct thing. sometimes in some situations we can stick our finger into the concrete to kinda see where it's at. and then we kinda know when to start. knowing where we're going to finish at from an impression standpoint. you want to make sure that you have the consistent stamp throughout the concrete install so you have the same impression from where you start to where you finish. at that point, we will start installing our ashlar slate pattern on the top platform of the step. we'll be using probably 3 to 4 stamps that kinda interlock with each other. they have different stones on each stamp and as you stamp the concrete, you want to turn the stamp to have a different layment of the stone. the stamp itself varies between a quarter inch to a half inch and you want to make sure you get that full depth of the stamp impressed into the concrete. >>miriam: so it needs to be soft enough to take the deepest
8:11 am
impression. >>: exactly. soft enough to take the deepest impression but at the same time, too, it has to be soft enough where we're still able to run the consistent stamp design through the duration of the pour. >>miriam: yet firm enough where you're not going to sink into it. >>: that is correct. you want to stand on the stamps and we have a rubber whomper that we use to impress the stamp into the concrete. a whomper, yeah. >>miriam: it is? >>: or a tamper...a whomper. >>miriam: i like that. so how long do you have to work on the concrete? >>: from laying it to actually stamping it and fine-tuning it i would say we probably have a 3 hour window from start to finish. >>miriam: now bryan is going to let the release agent sit overnight and then come back and wash it off. he's also going to put a sealer on it but he's going to wait on that and do that at the same time that he does the driveway. >>: once the concrete is set up and hardened, we'll come the
8:12 am

next day pull our forms. then we'll do a light wash on it. after spraying it off, we proceed on to adding a little bit of dish soap to water to breakdown the release color. fine-tune that in. not scrubbing too hard but just enough to get the detail between the 2 colors. after that dries, we'll put a sealer on there and that's kinda the final product. >>dean: now most garage doors face toward the frt of the house. great for access but not so great when that door opens and everybody in the neighborhood sees the mess you've got going. it can be a little embarrassing. all it takes is a little bit of organization. now what we really like are these heavy duty cabinets that come in a lot of different sizes. tall utility cabinets. base cabinets. different types of uppers. even a workbench. so that helps to get some of the clutter up and out of the garage into those cabinets. now another thing we like are these track systems. you get them up on the walls. you can take the tools you don't have in the cabinets spread them across the walls so when you're looking for something, you just pan the wall. easy to find. these come with a lot of different hangers. well first of all you have sort of your general purpose ones. these you
8:13 am
can use for hanging hammers, ladders, all sorts of different things. this is kind of a unique one down here. you can see it holding a bicycle tire. these are for hoses. on this one, a ladder rack here. and this is a netted bag that will hold all your basketballs, volleyballs and baseballs. and believe me we'll just scratching the surface here. now one thing that's really neat is this little locking feature. you get it into position up on the track. then you turn it sideways like that. it locks it into place. in pulling a few of these elements, you've have the best looking garage in the whole neighborhood. >>miriam: well bryan and the guys were able to finish the porch using about a half load of concrete. for the driveway, it's going to take more like 2 full loads. they've already got the first half of the driveway done and now they're working on the second half. the basic steps are very similar to what we saw on the porch, but of course the driveway covers a lot more square footage. so besides the
8:14 am
spreading, finishing and stamping, there's also the issue of control joints which you always see on large stretches of concrete. and that's to limit the visible impact of any cracks that are bound to occur because of changing weather conditions. >>: there are 2 options you have when trying to prevent concrete from cracking. one option is to saw cut the joints in the next day. today we decided to hand tool cut 'em in. we're controlling where the concrete should crack. we're able to chisel the joints after we stamp it to give it that look of chiseled edge stone. we're making the concrete look like roman slate. a piece of stone. so the edges of the control joint we want to chisel them to look like a piece of stone. then we'll proceed on to applying the secondary color and then start stamping. for people to control this much concrete which is about 23 yards of concrete, you need all hands on deck to attend to the concrete and stay ahead of it. >>miriam: now i know this is a roman slate pattern which matches up with what you have on the edge around your porch
8:15 am
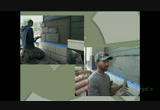
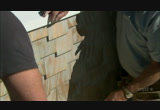
right? >>: that is correct. along with us installing a nice concrete, we like to have areas of stamped color tie-in with each other. so with the porch in the middle, we have an ashlar slate square pattern and around the perimeter, we have the roman slate which ties with the driveway. so we'll tie-in all 3 pieces of concrete together so visually you can kinda see the concept that we're trying to portray. >>miriam: okay, and then you'll be back to do the walk. >>: that is correct. we'll be back to do the walk. we have our step and porch. that height is established. our driveway height is established. both of them have proper drainage. now we have the sidewalk in the middle where we can meet the 2 together. >>dean: bryan still has a couple of steps left on the stamped concrete but once the driveway is set up, the masons got rolling on the sandstone veneer out front. that's jason cavanaugh and chris davis working the trowels out there. they got all the preps done yesterday so they can really go to town today slathering on mud and putting stone in place. the color blend is known as deep forest which has some dark blues and grays. sizes range from 6 to
8:16 am
24"s long and 4 to 14"s high. that means the guys can set it in a fairly random fashion so it looks more rustic and less formal. and using this thin veneer format, the masons will tell ya, it goes up really really fast. so jason, what you're using here is actually real stone, right? >>jason cavanaugh: yes it is. it's just the face of a real stone. this is a face and what they do with a normal stone is about 4"s thick. and what they do is they'd cut the face off. and then it's easy. you can stick it to any wall. >>dean: so the reason for this is it's cheaper to ship. it's quicker to install. >>: mmhm, quicker to install and you don't need a footing to put it on. you can put it in the middle of the wall. just stick it right on there. >>dean: and so how does it go on? how does the installation differ from let's say installing regular thick 4" veneer stone. >>: well a thick 4" veneer, you start at the footing and you put mud down and you keep stacking it. this you don't need to stack it. you stick it. you put some mud on the back of the stone.
8:17 am
and it just ... give it a little wiggle and it just sticks right to the wall. >>dean: and that's sitting on top of a mesh. >>:well, we've got the tar paper. and then this is our weep system which any water does get back there, it weeps down the tar paper. comes out the weep system. there's little holes under here so we want get to there. it comes out the holes and then we put our mesh on and we put a brown coat on and then the stone goes right on top of that. >>dean: okay. then what do you do once it sets up? how do you strike the joints and stuff? >>: well what i do is i grab my grout bag and i get some mud in there. and we put the mud in the joint first. you start from the back and let it come out the front. and then you let that dry for a couple of hours and come back
8:18 am
with a stick and just tool it out. >>dean: just like decorating a cake pretty much. >>: yes, pretty much. >>dean: once you strike that i mean it looks like you have no idea how thick that stone is. >>: correct, yeah. because all you see is the very face of it. >>dean: and talk to us a little bit about the corners. how do they create that total illusion that it isn't ... >>: well the corners ... this is your full stone - would be this and the face. >>dean: so if you were installing regular veneer stone, the whole piece of stone would be in there. >>: it would, yes. the whole piece of stone would be this thick square right here. what they do is they take a saw and they just cut both sides out so when you put in on the wall it would look like a full stone. >>dean: now it's just pretty incredible the way they do this now today. >>: oh, yeah. and the labor is a lot cheaper with this kind of stone than a full stone. >>dean: as an exterior cladding, the sandstone weathers really well because of its high compression and low absorption qualities. that's what you look for in any climate, especially ones with a lot of freeze and thaw cycles that put a lot more stress on building materials.
8:19 am

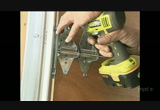
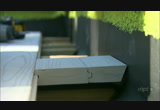
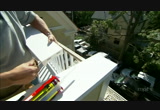
>>miriam: things are really moving along quickly now. bryan has finished up the stamped concrete. jason's wrapped up the stone work and i'd say our last landscape is about 90 percent there. now bryan did have a chance to put in the sidewalk. he sprayed off the release agent. that's looking really good. once he gets a sealer on there, we'll be able to call that done. and the masons finished off the stone work so now you can get a better feel for how the sizes and colors actually look up on the wall. one of the last major items for the front of the house is going in right now and that is a set of garage doors. these typically take a few hours to install. these are sectional doors with 4 panels each and the typical technique is to attach some hardware and hinges, assemble them in the opening, put up the tracks, attach the spring and then set up the opener. with the garage out front on this house the garage doors play a big role in the home's curb appeal, so the carriage style design and trim is going to be a big plus.
8:20 am

jim lundberg's has been our point person for this particular project, and they're making really good progress, huh? >>jim lundberg: yes we are. yes we are. we're almost done with the first door and we'll start working on the second one fairly quickly. >>miriam: excellent. now this is what they call a carriage style door. >>: correct. this is our carriage style wood door. custom made. and the carriage style has a look of the doors want to open up like a carriage style doors. >>miriam: exactly. and the arch top? >>: yep. it's a custom made that the builder wanted us to match the arch of the opening. and i think we did a pretty good job. >>miriam: yeah, i think so too. and this is cedar, right? >>: yep. western red cedar construction. it's a 4 layer constructed door. they're built by the amish in a small community in ohio. each panel is individually constructed. there's a lot of labor that goes into it. yeah. but they are built in a factory so we can keep the cost down and make them affordable for everybody. the doors are insulated with an expanded polystyrene insulation. r-value of about 5 which is more
8:21 am
than most wood doors. >>miriam: is this pretty heavy duty? >>: yes. it's a heavy duty door. heavy construction. so obviously the door is going to need springs and those kinds of things as well. so we use a heavy duty commercial grade hardware. first grade hinges. these obviously weigh a lot more than your standard door. so use a double roller, heavy duty hinges. it's a commercial grade hardware that we put on these doors. the track system they're made according to the weight of the door. this one is heavier than most because the door is heavier so our track has got to be heavier as well. the spring is counterbalanced to the exact weight of the door so you'll be able to open and close it just like any other door. >>miriam: now with a heavy duty door, you're going to need a heavy duty opener. >>: correct. >>miriam: so you're going with a 3/4? >>: 3/4 horse opener. is a solid rail construction. belt drive. and it's a state of the art opener. completely silent. it's got an electric eye in the actual opener so when you walk in the garage, your lights will turn on automatically. you could go with a chain drive. they're just noisier. so the belt drives have proven over the winters and
8:22 am

they work very well. >>miriam: i think these really complement the house the aesthetically i think, don't you? >>: yeah. i was very pleased when i saw it. i think that they really pop from the outside and it really, really looks good. typical installation time on a door like this, generally speaking, it's going to take 2 to 3 times longer than a regular door because these are put in the way we use to put in doors 30 years ago. so it's a little different. a lot more care is taken. it's not a builder door. it's made for a custom home. >>miriam: building a house, it's a good idea to have all the exterior elements done before you put in trees, shrubs and sod so you don't have workers in there tearing things up with ladders and tools. it's also a good idea to have all the landscaping done before you seal up stamped concrete. the sod is done so bryan is back with the sealer and the driveway and the sidewalk here look really good. >>thank you. >>miriam: what exactly ar using for the sealer? >>: we're using a acrylic sealer. it's 100 percent soluble. it kinda stands up against our minnesota winters
8:23 am
when it comes to the salt and sand. >>miriam: this is 2 coats, right? >>: that is correct. we power washed the over broadcast of the secondary color. and then we applied a curing compound to the concrete for curing purposes. the second application is fofor the sheen to kinda interlock the colors with each other. >>miriam: and what about maintenance? >>: i would say, applications with just foot traffic like the sidewalk and front porch, i would probably recommend sealing it probably every 2 years. as for the driveway just the wear and tear of surface tags, i would say probably every year. >>miriam: well i have to tell ya, it turned out absolutely gorgeous. really, really nice work. >>: thank you. >>miriam: thanks for helping us out. >>: thank you. >>miriam: there's still some work to do inside, but as far as the exterior goes, this home is pretty much done including the materials that we wanted to show you: the slate-style roof. the sandstone veneer. the garage doors with the arched trim. and the stamped concrete that we just saw bryan sealing up. now what you see from the street
8:24 am
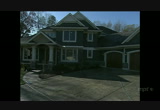
is a great example of what people mean when they talk about "curb appeal". i hope you enjoyed seeing it all come together. for dean and the guys, i'm miriam johnson. thanks for watching. ♪ >>dean: visit hometime at pbs.org. we've got more details about our projects. tips on owning and maintaining a home. and a great glossary of building and remodeling terms. stop by and see us at pbs.org. >> man. what we need is some elbow grease. >> yeah, you can... are you kidding me? >> gmc. proud to lend a helping hand to hometime. ♪


8:30 am

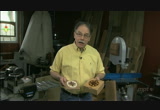
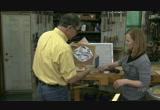
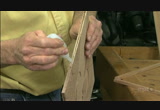
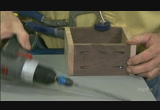
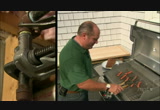
phillips: greetings from the american woodshop. i'm scott phillips and here's what we have going on in the woodshop today. we're going to make beautiful, inlaid decorative boxes. we have a special guest that will share her technique with us. suzy will show us how to inlay beautiful accents in hardwood floors. and i'll give you some wonderful band-saw tips so stay right there. announcer: "the american woodshop with scott phillips" is brought to you by... ...delta -- the heart of woodworking for over 85 years... kreg -- from the first cut to the final assembly, providing woodworkers with products that help simplify woodworking challenges. kreg... ...woodcraft -- since 1928
8:31 am

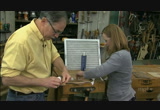
providing traditional and modern woodworking tools and supplies to generations of craftsmen. woodcraft -- helping you make wood work... gorilla glue -- for the toughest jobs on planet earth. phillips: let's have some fun together. we're going to paint with wood. that's inlay work -- multicolored woods different grain patterns -- and we'll make a beautiful box together by using a scroll-saw technique, and you'll learn more about that in a second. and suzy will get into wood-flooring accents, and i'll show you some resaw tips on the band saw you won't want to miss. but first, a word about shop safety. before we get to work, be sure to read, understand, and follow all the instructions that come with the tools and products you use. work safely. safety glasses hearing protection. now let's go visit with cheryl to see her scroll-sawing technique. we're here with one of the finest scroll-saw artists ever -- cheryl gustafson.
8:32 am
and, cheryl, how long have you been doing this beautiful work? gustafson: since 2002. phillips: now, what's this pattern? gustafson: that is a log cabin quilt design. phillips: oh, it's beautiful. i love the way you paint with wood. you have over a dozen pieces of wood in there and all that starts out as solid wood that you cut out on your scroll saw. look at these patterns. now, this one right here -- what's the orange-color wood there? gustafson: that is padauk. phillips: okay and there's purpleheart. and what's the red? gustafson: the red is bloodwood. phillips: bloodwood. so she paints with wood, and all this is done on the scroll saw. now, the boxes are beautiful, too. look at this star pattern here. describe how you came up with this design. gustafson: well, it's a quilt design made with stripped stars, but, to me they look like flowers so i decided to put it in like a flower. phillips: and the boxes -- well, those are made by your woodworking engineer husband. and you can tell he's an engineer because look at that joint work. that mitered corner right there -- it's perfect.
8:33 am
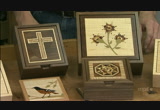
well, quite some time ago, suzy and i bought this from cheryl and tom. and this is called the mariners star. and it says "suzy, put special memories in here "to help navigate life. love eternally, scott." the only problem is all that's my stuff. [ laughs ] well, now, let's learn your tips. let's head to the scroll saw. gustafson: okay. i would love to show you. phillips: now, this mariners star's tricky. now, here are her tips. she comes up with the pattern, and then you create this on the scroll saw, right? -gustafson: right. -phillips: okay. how thick is this wood? gustafson: i use 1/2 inch thick and, then, when i have it done i can resaw it and i'll end up with three designs, actually from one glue-up. phillips: and it's easier to actually glue that into your piece then and let that cure and then resaw that off. and, then, you can do that again and again. three times. okay, so, now what she's done -- describe what we see here. gustafson: to save on cutting and piecing
8:34 am
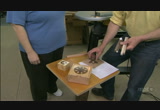
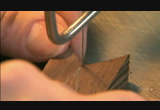
and getting everything lined up right i glued two pieces of wood for each point together first -- my two colors. phillips: mm-hmm. so, that saves time, and it makes a tighter joint. now, the cutting technique is -- describe the blade for us. gustafson: i use a blade that is a reverse-tooth so the bottom doesn't get tear-out. and it's eight teeth per inch precision ground. phillips: oh, boy. that makes all the difference, doesn't it? gustafson: yes, it does. it does. phillips: and, then, this case the table is set square to the blade. on suzy's, we'll tilt that down to a four-degree angle but now let's see your cutting technique because that's what's different for everybody. gustafson: i am going to cut a little bit oversized because i'll do my final touching-up on the disc-sander saw. [ whirring ]
8:35 am
phillips: and you notice when she finished that cut she didn't break out of the cut. you cut out of the cut. -gustafson: right. -phillips: and that's perfect. and it's light-fingered pressure down to the table, so let's show this to the folks here. gustafson: it didn't matter that i'm a little bit outside of my line because my final shaping will be on the disc sander. phillips: okay. gustafson: so if you're not wonderful on the scroll saw, you can still do this inlay. phillips: let's see a few more cuts here and then we'll go to the disc sander and trim this up. and, also, the speed setting here -- it's dialed down a little bit from full speed, and i like to start the blades full speed and if it's not behaving well, i dial it down just a hair and that makes a big difference. okay. let's check that out. gustafson: okay. well, see if this is squared. phillips: okay. now, let's hold that to camera so the folks can see it.
8:36 am
okay. so, boy, that's pretty close. gustafson: pretty close. i got to fix a little bit at the point yet. phillips: and, again she cut this oversized. now, make sure that the table is square to the 6-inch disc, too. gustafson: right. that's very important. otherwise, the top of your piece will fit and the bottom will have a gap which you don't want. okay. that's good. perfect fit. phillips: okay, now, that's a perfect fit. and, then, come down here, cheryl so we can see how these kind of stack together as you're forming a star. gustafson: i leave the dark side on the left normally each time. and i'll put two together like that. and then i sand them all. then i touch them on the edge of the sander to make sure it's perfect. and then i'll glue my next ones on like that and just go around. phillips: okay. well that's all straightforward. and the other thing she does -- she doesn't have scrap. she uses all the pieces, then,
8:37 am
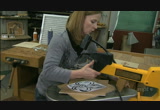
to go and fill in the mariners star. thanks for sharing your scroll-saw tips with us. gustafson: you're welcome. phillips: now, cheryl and her work can be seen all over america so check it out personally. suzy: this is my pattern i'm cutting out -- a fleur-de-lis and our oak flooring with the ribbon, mahogany. this is the opposite of the way it's gonna be turning out, but this is my practice piece. phillips: now, what she means, right down here -- this is a diamond pattern, straight-grain wood here quarter cut. and we're going to inlay -- now i'll let you peel the double-stick tape off here -- some ribbon mahogany. now, while she gets that peeled off, let's talk about blade selection. now, this is the blade we're using. it's nice and fine -- it's a number 5, 12 teeth per inch. see this wider-blade precision though? that's what cheryl liked for straighter cuts. this thinner, finer blade with wider-set teeth will cut those curves and tight corners a little bit better than a wider blade. now, blade selection's key to success in scroll-saw work.
8:38 am
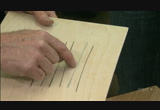
okay, though. suzy: okay, scott, i've got the last piece of the double-stick tape off. and, then, next, we're gonna fix this to our workpiece for the double-stack cut. and we're gonna be doing it this way 'cause the flooring is coming into this shape at a 90-degree angle. so, we want it this way, and i'll fix it down here. and then we'll just kind of... phillips: lay the pattern on so point of the fleur-de-lis is on the very center seam of the wood flooring that's bonded together. that has temporary-bond spray adhesive on it. and i used this filter in the background so i didn't spray the adhesive all over the place. and the key to using double-sided tape like this is you need to put it under a little bit of clamping pressure here so that it stays together when you want it to. suzy: right. i don't want it to come apart till i'm ready for it to come apart. phillips: okay. and you want to put it on all four corners just like that. and, then, suzy, this is done, and where do you like to drill the fine pilot hole
8:39 am
to pierce the blade through? suzy: i like to do it right down here in the bottom of this curve cut. and that's gonna be the least noticeable. so, you help me hold that. phillips: okay, so clear of the bench there. and you like to do it square because that way the blade goes through better. suzy: yep. make sure i've got a clearness. phillips: yep. you're clear there. [ drill whirring ] suzy: okay. the pilot hole is done. now it's time to thread the blade through there. okay, scott. phillips: okay. now, i have it unplugged. whenever you touch a bit or a blade, it should be unplugged. suzy: absolutely. phillips: and the other thing, as she's piercing that through give us your tips. suzy: right. i've got it pierced through there, and i want it going this direction 'cause i will go in a clockwise motion. so it's smart just to have it lined up there. and i'll take this block of wood that's supporting this out. and then we can get to work on tensioning the blade. 'cause that really is the most important step. and, you know, you might have to hold this down a little bit so we can get that blade in there and tighten that.
8:40 am
then we can start checking the tension. and you may have to check it a couple times. okay, scott, let's get that plugged in. phillips: very good. and power's on down here. good. suzy: and i've got my guard, and we'll get that in place. and then we will be ready to go. phillips: okay. now, let's turn on that light. -suzy: thank you. -phillips: there you go. and, then, get the blower in place to keep the sawdust off your pattern line. -suzy: yep. -phillips: okay? now, one key thing to keep in mind -- this is like a cork in the bottle. if you look at this piece right here you can see how one piece locks into the other. now, that's at a 4 1/2-degree angle tilted down to the left. and that was a little bit too much of an angle. and this is a 4-degree angle which is a perfect flush fit which is what we want. that means the table's been tilted to the left and locked at 4 degrees. and so, by doing that, the inlay will be flush with the surface of the wood of the floor.
8:41 am
so it's time to get on to cutting, suzy. here are your safety glasses. -suzy: thank you. -phillips: okay. suzy: time for the fun stuff. phillips: okay, now, how do you select your speed? suzy: well, i usually put it pretty high -- either 7 or 8, max it out. and then i can always dial it back down if that's a little too fast. phillips: so you start high and then take it down if you're having problems with the cut. now, let's see those cuts. suzy: all right, we ready? everything's plugged in. got my speed set. just want to keep finger pressure down. and just follow the line or just right outside of that pattern. and just have fun with it. phillips: so, when you come down to a point there at the end, tell us how you like to do that. suzy: well, i just take my time, and once i get down here i just put a little bit of pressure on the blade and then make the turn.
8:42 am
just keep going right along. don't forget to keep this steady pressure down on the table. and just follow your pattern. and a pattern like this is a free-form pattern. so if i go a little bit outside the lines, i'm not too worried about it. on some of the points on this, i'll actually go a little wider 'cause i like them a little rounded off. and, then, just when you get in a deep coat like this you really just want to take your time. and it's really just that easy and it's a lot of fun. just take your time, don't force the blade, and you'll come out with a great pattern that is unique to you. one more curve, and i've got it.
8:43 am
-all right. -phillips: okay. it's unplugged, so you can touch that blade now. suzy: yeah if you want to touch it now. phillips: there you go. suzy: place this up against this block and then we'll see how it all comes together. phillips: okay. again, this is called a stack cut, or pad cut as some people call it. and the moment of truth. you peel the pattern off. suzy: oh. got that. phillips: you go ahead and get that. and if you do a light coat you can peel the pattern right off without taking your fingernail off here. suzy: definitely. and it goes quick. [ hums ] phillips: okay. so, let's see if truly we have the perfect fit here. suzy: do you doubt? -phillips: never. -suzy: never.
8:44 am
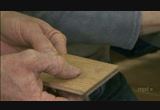
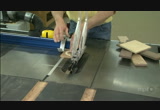
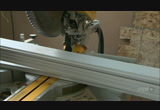
phillips: okay, go ahead. get that in there. suzy: "shweet"! shweet, shweet. phillips: okay. it's got to go all the way down. and it does. that is excellent. suzy: perfect fit. yay! -phillips: how about that? -suzy: how about that? phillips: okay. so, that will be a perfect floor accent. now, to do this glue-up, what i do is i take the floorboards -- individual boards here -- and i just use a good wood glue in that groove and press it together, and i let that cure out for an hour. once that's cured, it's over to the table saw. and here's how that goes. once the glue-up is cured out, i just make 45-degree cuts -- i've already done one there -- by using the miter gauge set at 45-degree angle here and locked in place. and the key is having a good 80-toothed plywood blade on here because now what i can do is flip this over, bring this point up to the stop on the jig lower the fence, or the guard here,
8:45 am
make that cut. now, watch what happens. [ whirring ] all the way through. turn it off. with the saw and the blade stopped, raise that paw, and there's the first part of the diamond. that's half of it. and there's a groove. there's the tongue. those will mate together. i just need to make this identical to this piece. and to do that, i slide the miter gauge all the way back. and now, with the good face up. and i don't get any tear-out with that good plywood blade. i make a mating cut. and that's all there is to cutting the perfect diamond. okay. take your time. secure that workpiece to the fence. and that is, as they say, that. turn it off. let that come to a stop.
8:46 am
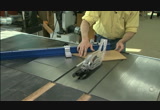
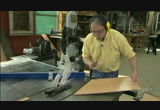
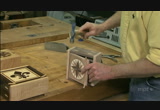
i won't touch that scrap till that stops. and we just glue those pieces together, and that's how we end up with what suzy is going to inlay in the floor. the final step of this process is to trim it out very quickly and efficiently and press the corners down and the miters together. i used 1/2-inch white mahogany. and to cut that to miters, i use a precision miter gauge with a miter fence and stop on the band saw. that's the easiest way to do it. i use thick viscosity super glue to bond the trim to the diamond. and now, in 15 seconds' time that trim is there to stay. suzy will get a finish on it and it's off to boxes at the band saw. suzy: get to work! i've got mine done. phillips: and here is another fleur-de-lis.
8:47 am
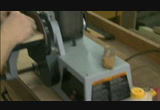
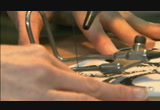
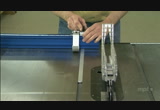
cheryl made the lid. and then i wanted to design a brand-new style of box. these are plugs that are inlaid. i call this a horn box because you have two horns coming off the front of that. something a little bit different. and that's what we're going to make and surround this mariners star that cheryl made. now, this glue-up right here the round one, is all done now and applied to the top of a cherry lid -- 5 1/2 inches square. and to make this into multiple pieces what i'll do is bring that up. use a heavy-duty push block, a 1/2-inch four-tooth blade with a grain resaw fence. and as long as i hold that tight to the fence everything's under control. now, we're cutting through exotics. we need good dust collection here. we don't want to breathe that fine dust. and hearing protection on. the fence is locked. and once i start to make that cut i have one job to do -- hold that piece securely to the table and against the fence. and when we do that, everything will turn out just fine.
8:48 am

see, i'll capture that. now, let's go ahead and saw that right off. take your time here. this is not a race. let that blade do its job. now, my fingers are never in the plane of the blade. as i finish that cut i'm all the way through now, i turn it off. i don't try to move that workpiece until that blade stops. that's very important. that looks good. right there is a perfect very smooth cut. that's good. that'll become the lid to another box. and there's a mariners star inlaid in that cherry. next, i use the exact same setup to resaw the walnut and maple boards for the project. here's i ended up with those beautiful 1/2-thick boards. now, two walnut, one maple.
8:49 am

and earlier, i planed this down to a 1/2-inch finished thickness. and it's really important to take light cuts on the planer to reduce tear-out and shatter. [ saw buzzing ] after i have the workpieces ripped to the right widths i check the lid to make sure it's perfectly square. if it's not, everything else will be off. and it is. and what i can do now is use a swing stop on this precision-miter-gauge system right here so that when i bring the workpiece up to the blade when it's off and bring the swing stop over, that gives me the perfect spacing to cut out the plywood bottom, which is identical to the lid. and i make sure that one shoulder is absolutely square, and then i can bring that up against the stop. it's already been ripped to the precise width
8:50 am
again, matching the lid. and i'll just go ahead and trim that plate. turn on the dust collection. [ machinery whirring ] okay, now notice when i turn off that saw that scrap piece is there. let that blade come to a complete stop and then remove the scrap. and the rest of the process goes like this. i trim the walnut pieces so they're square on one end going up the stop, cut those to the precise same length as the plywood bottom. and then i move out the swing stop 1 inch to accommodate the 1/2-inch-thick walls and cut the maple front and back. from there it's over to the assembly table. there are six basic parts to this box -- the top, the bottom, the front and back, and the two sides.
8:51 am
the two sides and the very bottom get pockets. now, i'm using a micro-pocket jig. that's 1/4-inch bit with the stop set for 1/2-inch-thick stop. and on this piece, you can see the pockets that are drilled in the bottom and plugged. well, that's what i'm going to do. i'm going to select the worst grain when it's both good, so it's all good. no measuring required. get it flushed to the edge of the jig and drill a pocket. and so, i'll drill four pockets. i'll speed that up a bit. just like that in the plywood and four pockets in the walnut workpieces. and then i'll show you how to assemble the box. it's just that simple. this is such a great tool to use for things like this. can't beat it.
8:52 am
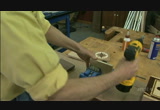
once i have the 12 pockets drilled you can see how that assembly comes together. i'm using an assembly table where i have a front vise here. that's called a clamp vise. i can clamp this down from the assembly table to secure the workpieces. i start the 3/4-inch screws, back it out. and these are so delicate. i'm just getting a pilot going right there. and once they're set i take that apart and drive it home by hand because this is a fragile workpiece and that gives me the accuracy i need. now i can put these two pieces together in the same way using the pocket jig right here to draw it all tight. and once i have that assembled i put the bottom in and pocket-screw that in place. okay. in each of the pockets i'm going to use two drops of good-wood glue
8:53 am
and maple plugs that are precut to fit right in there. and once they're all plugged i take it over to the belt sander sand those plugs flush and then it's on to finishing. to put the horns on, and that's what holds the lid up on the front edge, i like to use an activator and cyanoacrylate adhesive. and i just hold it in place. you want to keep your fingers moving for just such emergencies. you don't want them to bond to the lid. glue those in place. okay. i predrilled a pilot hole for the brass brad that becomes the pivot left and right. tapped home. and there we have a very elegant box. and that's all there is to it. now, outside to do a bit of spray finish, then we'll get a look at the finished project.
8:54 am
so, this is the pocket-joint box. walnut-maple accents with cheryl's mariners star on the top. beautiful scroll-saw work. speaking of scroll-saw work, let's go check out the inlay that suzy made earlier see how that looks in the new floor. the moment of truth! okay, we're using floor-construction adhesive. it's like a contractor's adhesive and comes in a big bucket. have this troweled out. you want a tooth trowel. and i already have it on the backside of what suzy cut out. so, suzy, go ahead and ease it in there. easy does it. if we get a little squeeze out or get it on the floor water on a rag will get it right off as long as you get it right away. you want to make it flush. pressed it in. suzy: ooh! it looks great! the perfect accent. i love it.
8:55 am

phillips: okay. now, you're a pro, suzy. -that's just beautiful. -suzy: thank you. phillips: great way to dress up a floor like this. now, fleur-de-lis, well, it's not just for the inside. let's take a look at the garden gate. okay. to bond those scroll-saw accents to a fence just use clear silicone, and you're in business. suzy: looks great. it'll be there forever. i love it. left and right fleur-de-lis. reminds me of home in louisiana. phillips: okay. well, now, on to next week. what's up? suzy: turning columns and indoor accents. it's gonna be good. phillips: interior-design accents out of wood. so, thanks for being with us today. hope you join us next time and stay well and get busy in that woodshop. suzy: see you! phillips: okay. boy, what a beautiful day. suzy: mm-hmm. announcer: delta -- the heart of woodworking for over 85 years. kreg -- from the first cut to the final assembly,
8:56 am

providing woodworkers with products that help simplify woodworking challenges. kreg. woodcraft -- since 1928, providing traditional and modern woodworking tools and supplies to generations of craftsmen. woodcraft -- helping you make wood work. gorilla glue -- for the toughest jobs on planet earth.


9:00 am

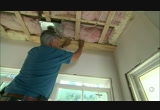
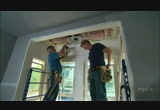
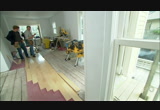
kevin: next, on "the this old house hour"... today, we'll warm up our house with some natural wood on the ceilings and on the floors. kevin: so, what are we putting down? norm: this is solid maple, tongue and groove, prefinished, with a very durable finish. that's what they use in bowling alleys. tom: it looks pretty bad right here. kevin: are you kidding me? norm: is this place really worth saving? richard: we can do better than this. tom: nice and easy everybody together. richard: it's state-of-the-art. norm: perfectly square. roger: all in all, a good day's work. kevin: right here on "this old house." and also on "ask this old house"... mulch is an important part of any garden, but if you put down too much it can be a problem. i'll show you the right way to mulch your garden. it's a red cone, it's made of foam rubber. what is it? this kind of says, "i don't wanna listen to anything you're saying!" kevin: all that and
9:01 am

more coming up. "do it yourself" doesn't have to mean "do it alone." at the home depot's how-to community you can watch videos read tips, and get advice from fellow doers. we're proud to support "this old house" and doers everywhere. ♪ [ wind howling bird squawks ] [ thunder crashes, car alarm blares ] when the unexpected happens, state farm is there to help you get your old house to a better state. proud sponsor of "this old house." [ grunting ] man! what we need is some elbow grease. [ laughs ] yeah, you can -- are you kidding me? gmc -- lending "this old house" a helping hand since 2002. funded in part by lumber liquidators retailer of hardwood flooring. their wide selection includes bellawood prefinished, bamboo, laminate and vinyl plank flooring. lumber liquidators is proud to
9:02 am
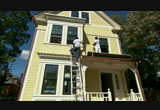
sponsor "this old house." norm: well, the exterior work on our cambridge project house is nearly complete and we've done a lot of work over the last few months. a brand-new roof on the entire house. copper gutters with beautiful copper downspouts. and we spent a fair amount of time working on the brick foundation repointing it and stabilizing it. also, all brand-new windows. now, the house needed a paint job so it took a couple weeks to prep it and now you see the final colors. an off-white trim, black window sash, and a yellow body. now, the combination of those colors would be quite common in sweden so it goes right along with our homeowner's scandinavian theme and it's just a hint of what's going on inside, which is what kevin and tom are working on. the design aesthetic for this house is going to be a lot of white on
9:03 am
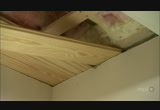
white. we're going to have white walls with white ceilings. in the kitchen, we're going to have white cabinets, and there's even going to be white tile backsplash. so the thinking is, well let's warm it up in a couple key areas with some wood. so the island countertop is going to be wood, a hood over the stove is going to be trimmed out in wood, and we're thinking why not put some wood on the ceiling so it's not all just plaster and to me, tommy it looks like you picked a bay window for the first spot to get that treatment. right, the bay windows on the first floor are going to have this right here. this is actually southern yellow pine with a six-inch face and it's tongue and groove. all right? now the trick to this is this is an old house. the bay is actually pretty crooked, all right? but the architect wants the boards on the ceiling to go in this direction and they want it to be tight to the ceiling and to the wall without any space because there's not going to be any molding. looking for that nice, sleek look so what am i thinking, some scribing of that board maybe? well, we could scribe it but i have to get both ends tight,
9:04 am
and, like i said it's out of square it's out of -- everything's off. so what i'm going to do is i'm actually going to cut a notch right across the top on each side and then we can take the board and slide it into that groove. the painter will then come back, touch-up the wall, because he has to do some touch-ups anyway. so what i'm going to use is this piece of 1 x 3 material. it's 3/4 of an inch thick, the same thickness as our ceiling. i'm going to just tack it up here against the strapping. what we'll do is we'll use this as our guide to run our saw. okay. so now i'm just going to follow along this with my oscillating saw.
9:05 am
for our ceiling, we need a total of six boards that have to be all one piece, no joints, and we have to look for any imperfections to make sure we don't have any of those up there. try to avoid the knots if we can. let's see what we've got here. 85 7/8. you got it. we're going to clear that knot, so... all right, mark that. see if we can get a length on that one. the center of my light is right there
9:06 am

so i want to be from this edge 43 1/4. kevin: got it. okay, so now it's center of the light right here, 2 3/16 we will be... 13 inches out from the edge. all right, now this is our first board that will go against the outside wall over the window. we'll match up our tongue and groove joints make it tight. make them even. okay. now i want to take those measurements that i took for the light that's in the middle of the ceiling there and i want to transfer those measurements from here out. that was 13 inches? yep. and 43 1/4. so, easier to cut the hole for the light down here than up on the ceiling right? absolutely. 43 1/4. now i'll set my compass in the center mark draw a circle. and we'll cut that out with our jigsaw.
9:07 am

all right, let's see how we did. place this end in our groove. now i slide it over just about halfway. now it's in on both sides. push it in. there it goes. look at that, tommy. perfect fit. once in a while, you get lucky. tom: i rip down the board wider than we need for our last piece. follow the wall with our scribes. i set my table saw on an angle and as i cut it, i'm going to weave the line
9:08 am
on. now we'll let the painters touch up the wall and put the finish on the ceiling. the entire third floor is dedicated to a master suite with a bedroom, a closet and a master bath that is really starting to shape up. we have got the floor tile down, this really vibrant blue and on the wall, we've got this sort of off-white subway tile, sort of a wainscot here, but all the way up the walls in the shower, and it's still going up, thanks to mark ferrante. mark, i love this tile. how are you? great. so what are we working with? we're working with an 8 x 24 glazed ceramic. see the lines in it? i do, very subtle. done with an ink-jet printer. seriously? glaze and all. so the glaze replaces the ink? yeah. i like that, very cool. so we've got it going up on the vanity wall all the way up? all the way up to the ceiling, except right here. what's going right there?
9:09 am
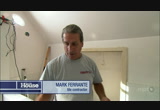
well, we're going to put this -- excuse me. oh, there we go. an enamel mosaic. so, same tile that's down on the floor going up there. but, if you notice look how thin it is compared to the field tile. and how do you handle that? so i have to pad out these walls here. okay, we have some more backer board to go up? yes, we do. i'm going to glue it with some thinset. so we've got a 1/2-inch notch there, 1/4-inch? it's...yeah, it's a 1/2-inch notch. 1/2-inch notch. here we go, so just right on the edge. yep. i also marked the board so i can put some screws in it. now we're skimming the board with thinset.
9:10 am

look at that, kevin. oh, yeah. flush, perfectly flush. that's great. okay, here's number two. all right, you thinset i'll lay the tiling. okay. that's it for the feature strip. and then what's next? now we're going to set the tile up top. so you can put the thinset right onto the plaster no need for a backer board? right, not a wet area. here's another one for an angle cut. yep, we're just going to take it from the bottom first, mark it. and we take the top measurement, it's 12 5/8. connect the dots and
9:11 am
we'll cut it with a wet saw. that's a nice fit, huh? real nice fit. okay, there you go, mark. final piece. nice. and another perfect fit. that is a great-looking wall. yes, it is. all right, and when do we grout? 24 hours from now. nice. all right, well, all the finishes are coming together, mark. thank you. you're welcome. well, our homeowners want to get a lot of use out of this deck up here on the third floor and, well, you can't blame them because, i mean, it's essentially an extension of the master bedroom so we've gone
9:12 am
to great lengths to make this nice space. we actually tore off the old deck and then we lowered this one down so that there was just a small step from the master bedroom new door, new windows, and now it's sort of just sunk in here like a little crow's nest. we're got these two walls up so all we have to do is install the railing but first, we've got to get the decking down and, tommy, we are using a cellular pvc on the decking. we've actually used pvc before. we use it a lot outside on trim work. fantastic product. right, but this is the first time we've actually put it down as a deck board. oftentimes, we're either using hardwood or composite where there's some wood flour in it, so pvc this is a first for us. it's the first. cellular pvc is great because it works like wood reacts like wood in some ways, but it doesn't rot like wood. love the sounds of that. all right, so we're just screwing this down, tommy? yep, screw it down right above the tongue. using a stainless steel screw here? stainless steel trim screws. so pretty much fastening the same way as we would if it were wood.
9:13 am
well, if it was wood and we were using screws we'd have to pre-drill it first or we'd have to use nails. and it goes right in there no splitting. we're actually going to glue the last two pieces in, so let me show you. here's a piece right here that's going to go in. that's our next piece. that'll be glued down? we're going to glue that one down. our last piece will have to be cut on an angle and we'll tilt it into position, and that'll be glued down. okay. now once we get the first piece in we have to work fast get the second one get that in right away.
9:14 am
okay, there's one. all right, now we've got to tilt that second one in. a little tricky. tongue's in. okay. nice thing is just if we were tapping this on a piece of wood we'd probably dent the wood. all right, now before we even put the roof sheathing on, we had to put this 4 x 4 in because we needed to attach it to the roof structure below. it has to be real strong. we also had to make sure that we flashed it because we don't want any water to enter the building. but it's not the finished look. we want to actually dress that up, and we want the railing system to be as maintenance-free as the deck, so we're back to pvc. right, this is a pvc railing system that requires no maintenance and that will slide right over that 4 x 4. all right, okay. now, what i did, we need a post on each side, but i didn't want a full post, so i decided to cut a post in half using one side against the house, putting it on a 2 x 4, making that really strong. down here, you could see that i have a pressure-treated 2 x 4 screwed to the wall, and now
9:15 am
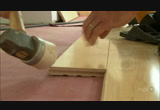
we're ready to install our railing system. pre-made railing, what is this some sort of a kit? well, it is a kit. all the holes are pre-drilled for the spacing of your balusters. all you need to do is cut the length and center the railing into that. nice. now we've got to drop it down onto our brackets. nice. it's in. okay, good. all right, so we need a second railing section and then the kit obviously comes with a top cap? right, it comes with a top railing, but we're not going to use that because the homeowner wants something different, so i'm going to customize a cap that goes right over the railing and right over the wall. oh, so it's one uniform look i get it, all right. well, you know what, already looks good. down here on the first floor the plasterers have covered up all of the blue board with their final coat of plaster, and now that it's dried, norm, you are off to the races putting down our new wood floor. you guys don't waste any time. well,
9:16 am

kevin, we're on a tight schedule. we've got to keep this job moving. so what are we putting down? well, this is solid maple, tongue and groove, prefinished with a very durable finish. and look how light color that wood is. i don't think we've ever put a floor down that's this light although we did just put that southern yellow pine accent up on the ceiling, so i guess this is a good compliment. yeah, and it's also a good choice of wood, because maple is very hard. it'll be durable. that's what they use in bowling alleys. so, solid wood floor we're going to staple or nail it down, pretty standard practice. the one thing that catches my eye, though is that you guys have started right in the middle here which is not that standard. well, kevin, this is an old house and it's probably a little bit out of square, so if we were to start at this outside wall and start coming across, it's okay in this room but as it goes into that room, it could skew off, and tom felt if you're sitting at the island here and you look down that wall and you see a wedge, it's not going to look very good. yeah. so we're starting on the wall, bringing a straight line right through this room. if it's off a little on the outside wall, the cabinets are going to cover it up. good, okay. so we've got the rosin paper down for a release, and we've got radiant heat down below
9:17 am
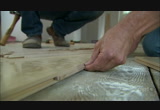
as well. right, that's what these lines are for. we do not want to put a staple through the tubing. and i guess we'll start laying this out? yeah, lay some pieces out and make sure the joints are staggered. and the idea is to drive these in using the mallet that comes with our nailer getting the joints together at the end and as tight as possible before we nail it. okay, we nail these about every 12 to 16 inches, and i'm using an 1 1/2 inch staple.
9:18 am
now, we started installing the floor along this wall, so when we nailed it it just went up against the baseboard, it didn't move. but out here there's nothing to stop the floor from moving when you nail it so we installed this temporary cleat and now it's time to take that off. now, with the temporary cleats removed we can start to lay the floor, and we want to go with the tongue forward so we can nail through that tongue. however, we have groove against groove, so what i did is i ripped up some splines made out of some scrap maple flooring and they'll just fit in the groove, and what they do is they actually create another tongue and we'll do that down the line. i've got one here with some glue on it. i'll just stick that in.
9:19 am
norm: a few staples in the spline, and then we'll continue laying the floor just as we did before. all right, well, i'm running the floor a little bit over this vent. i'll trim it out when we finish laying the entire floor. but, you know, we've got enough of this down now that we're starting to get a sense of how it feels in this house. it's pre-finished, it's nice and bright so it's going to reflect a lot of light. kevin: and this is the final look so we don't get a second chance to go over this floor. no sander's coming on after this or polyurethane so we've got to protect it 'cause it's a busy job site, and tommy actually picked up a big roll of this cardboard and as soon as the floor's down we'll put this over it and make sure it doesn't get scratched up. all right. 'course, the first thing is we got to finish the floor. let's get going. kevin: tommy i like to see it. you have been busy up here, huh? yes, i have. got the second length of railing put together. not too bad,
9:20 am
huh? no, these go together real easy. and this is just going to sit on this tab down here? yep. you in? yep, let me just cinch it up. okay, there you go. okay, i'm all set on this end, thanks. all right, that's nice and tight. our balusters are in place. now, this is the cap. we made it out of cellular pvc and it's nice and wide to cover our shingles on each side. now, for the railing cap on the other side, we've made this piece. now, it looks nice and thick but it's actually two pieces glued together. on this one, we made a dado in the middle to accept our balusters and a place for our posts, so when we drop this on, it will hold everything into position. beautiful, and we can screw right up from the bottom of the balusters into this, and how do we fasten the corners, tommy? in the corner here i have to cut a couple of grooves for a domino
9:21 am
to put into there and then we'll glue it into place. all right, so let's take this out of the way so i can get the machine in there. now, i have two reference points that i've marked on the top cap here that will match the end of the railing cap that's going here. all i do is line 'em up and cut it. okay, let's bring that one in. let me glue up the end first. the epoxy that we're using is actually a two-part epoxy and this is a fast-set so it takes about five minutes for it to set up.
9:22 am
i slide in the domino into the wet glue. now we've got to pry it into place here. i'll get mine started. yep. all right, i've got it by. you down all the way? yep. all right, i'm in. push the middle in over the post. there you go. all right, now i'll just screw that down to the post. these screws are designed for the cellular pvc. it comes with a tip. when it drives it into the cellular pvc it makes a hole that we fill with a pvc button.
9:23 am

after we get all these edges sanded up, it's going to look like one two-inch piece of wood. which is pretty good considering it's really two pieces of one-inch stock. right. all right, so i heard something about the homeowner not liking the yellow that's on the house for the shingles here, about maybe too much sunlight being reflected back in the bedroom? right, but they really like this gray primer that's on the shingles so i thought what we would do is we would actually use this weathering stain. it's gray, and over time it'll age out to a nice patina. is that what they mean by "weathering stain"? yeah. so let me show you what it's going to look like. oh, all right, so, not that different from the actual primer color. exactly. all right, well, whatever makes the homeowner happy, right? that's right. you know, there's going to be a lot of nice places in this house, but my guess is is that this roof deck here is probably going to be their favorite. i think you're right. well, until next time, i'm kevin o'connor. and i'm tom silva. for "this old house."
9:24 am
kevin: coming up next time on "this old house"... and, tommy you've got a little bit of a modern riff on the wainscot. what are we working on? well, we started right here when we made the doors out of mdf. we then apply these thin strips of 1/4-inch mdf so that we end up right on the seam of the door. oh, very clever, so we'll never see it, actually, once this is closed and all painted up. exactly, so all we're going to do is tack this in place. norm: that's next time on "this old house." one pair of overalls a few cans of paint. add a dash of doing and mix together. that's a recipe for a kitchen you can't wait to cook in. the home depot is proud to support "this old house" and doers everywhere. ♪ [ wind howling bird squawks ] [ thunder crashes, car alarm blares ] when the unexpected happens, state farm is there to help you get your old house to a better state. proud sponsor of "this old house."
9:25 am

[ grunting ] man! what we need is some elbow grease. [ laughs ] yeah, you can -- are you kidding me? gmc -- lending "this old house" a helping hand since 2002. funded in part by lumber liquidators retailer of hardwood flooring. their wide selection includes bellawood prefinished, bamboo, laminate and vinyl plank flooring. lumber liquidators is proud to sponsor "this old house." kevin: for more "this old house," go to video.pbs.org, where you can watch entire episodes any time. and like us on facebook to see behind-the-scenes photos. this old house magazine the companion to the television series, provides advice from our experts that you've come to know. you can use your credit card to order ten monthly issues for $10. just call...
9:26 am

[ knocking ] i'm jim anderson and i'm a stained-glass artist. when i first started doing this stuff it was the '70s, and for a long time, stained glass was still in churches, people hadn't thought about it in residential buildings. but when i was in it in the '70s, we were more experimenting with color and texture and glass and light and all these theories and it was just a whole new world. it was just -- it was lit-up artwork. these look good. they look perfect. not too much not too little. i had bought a building on the south end and i started making stained-glass windows, started putting them in my house, and i happened to be right in boston at this sort of monumental rush of all those people coming back into the city. i remember the first window i ever made in stained glass and when it
9:27 am

illuminated, boom! and it lights up. or, like when you're in the house during the day, boom! and color just pours through your hallways or lights up your stairwells. what i love about it is there is so much to learn from this medium constantly 'cause it's not just about stained-glass windows. like, a stained-glass window is attractive, but when you put it in a house, it can become like a screen to another room. it gives you an introduction to other spaces, it brings you into someone's front door. it gives you a feeling. it's like a marriage of art and architecture and it's so permanent. it's like it becomes part of a city part of a street scene. it's for the whole community so if you did your front doors in stained glass everybody gets to enjoy it when they walk by at night. everybody gets to appreciate it. i would say it's like jewelry on a woman. it's like embellishment on a house. it's like... the creme
9:28 am

de la creme. it's the final piece before you put your furniture in. it's like...perfect. kevin: today on "ask this old house"... mulch is an important part of any garden, but if you put down too much it can be a problem. i'll show you the right way to mulch your garden. a griller like you we've gotta get rid of this propane tank and switch you to natural gas. this thing is great, richard. how about a dog? are you ready? i'll make sure that this barbecue never runs out of gas. it's a red cone, it's made of foam rubber. what is it? this kind of says, "i don't wanna listen to anything you're saying!" kevin: that's next on "ask this old house."
9:29 am
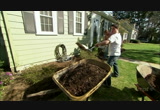
"do it yourself" doesn't have to mean "do it alone." at the home depot's how-to community you can watch videos read tips, and get advice from fellow doers. we're proud to support "ask this old house" and doers everywhere. angie's list, providing reviews of local roofers, plumbers dentists, and more written by people just like you, helping you find help when you need it. angie's list is a proud sponsor of "ask this old house." [ grunting ] man! what we need is some elbow grease. [ laughs ] yeah, you can -- are you kidding me? gmc -- lending "ask this old house" a helping hand since 2002. greg, i really like the house and i love that all the plants are starting to flower. that means it's spring and spring is time to mulch. yeah,
9:30 am

actually roger, every year about this time in the springtime we order about three or four yards from our local garden center, throw the mulch right on top of what we got. three to four yards of mulch is a lot, and putting it on top of each other, it builds up over time and too much mulch is bad. an inch or two is perfect. that'll allow water and air to get down in the roots. but take a look at this azalea. these branches are buried in mulch and you can't even see the main trunk of the plant. you take and scrape all this off and lookit, easily i'm getting four to six inches of old mulch off of the plant. now the branches are up in the air and you can see the main stem right there. yeah. so we need to strip some mulch off of this bed. and also, look over here. your window well, the mulch is already up to the top. if you put any more mulch on top of that if it rains, the water's going to come down and go where? into my window and into my basement. we don't want that to happen. no, we don't. so we're going to strip the mulch out of this bed, but before that, we're going to come out, we're going to cut a nice, fresh edge right along the
9:31 am

bed. okay. let's get to work. this is the tool we're going to use to cut the edge with. it's called an edger, it has a half-moon steel shape to it. it's got a little pad for your feet so you can really stomp on it, and it has a steel handle that won't break. so what we're going to do is we're going to line it up, jump on it and pick up the piece of soil, and we can see there's a little bit of grass in there. what happens is people will flick this up into the bed and this grass will just grow and become a problem. and they've also added soil to the bed, so they have to put more mulch on top of that. so what we're going to do is we're going to clear that all out along with the excess mulch so why don't you start down that end edging and we'll meet in the middle. excellent. always watch the line, now. you're trying to make a nice clean edge on this but you're trying to make a nice, smooth one, too. there, see how we have a nice curve coming down here and it lines up really nice? yeah. roger: all right
9:32 am

that looks pretty good. let's get all this edging and all the excess mulch out of this bed. excellent. roger, how do you know that you've gone deep enough? well, when you start seeing the topsoil which is this brown area here, and you start picking up all these little roots that means you've gone deep enough. yeah, take and scoop all that stuff out of the edge. just don't disturb that nice cut we made there, okay? i want to see that when you're done. okay. what i want to do is get all the heavy stuff off the bed using the rake then i'm going to get down with my claw and just clean out around the plants themselves. all right, roger this wheelbarrow looks full. what should i do with all this now? take it around back, put it in your compost pile. then it will break down and turn into compost. greg: all right, excellent. roger, do you want to dig down a little bit to make it so that the water stays in there for the shrubs? no, you don't want to create a ring. these roots have actually come out into the soil
9:33 am
all the way, and that's where you want the water and that's what'll happen. with an inch or two of mulch it'll let the water go down and the roots will be fine. okay, makes sense. wow, roger what a difference. i guess i did have a lot of mulch here. this bed is all ready to put new mulch in, but before we do that, i want to take a look at this cherry over here. if you look at it, it has what we call a "mulch volcano" around it. when mulch gets piled up around the trunk of a tree every season, it starts to resemble a volcano. the mulch will actually smother the primary root system and a secondary root system will grow into the mulch. these roots can girdle the trunk and ultimately strangle the tree. we've got to remove this mulch to make your tree healthy again. we're going to take these cultivators and dig very carefully around the trunk of the tree, removing the excess mulch. okay. so, roger, do you think we're going to have to replant these hostas? no, i think they'll be fine once we re-mulch this bed. what i want to do is get all the stuff out of
9:34 am

here so we can take a look at the roots. okay. roger: all right look right here. this is the root flare right here and here's a primary root coming off it. everything above that is secondary root growth, and we're going to cut it out. and when i work in the dirt like this, i don't use a brand-new pair of hand pruners 'cause i'll ruin 'em. and cut that one out and then i'll take and cut that one out. and then i might as well get rid of this one. now, this is the real culprit. you can see it's actually already wrapping around the trunk. i'm going to cut it here and then we're going to do a little more excavation and see if we can find any more. there we go. excellent, now i don't have to worry about these growing back or will they? well, you know, we're going to put a lot less mulch in here so the chances are they won't have a place to grow but we'll keep an eye on it, maybe check it in five or ten years. okay. all right, let's get this stuff cleaned out.
9:35 am

one thing you did right, you dumped the mulch on the driveway. so many times, homeowners will dump it on their lawn and then by the time they move the mulch, the lawn's dead underneath so congratulations. thank you. here's another thing homeowners do wrong. they try to use a pointed shovel like this to do mulch. now, that's hard to dig in and you don't get a lot of mulch with it. look what you get. so this is my tool for mulch. this is called an ensilage fork. it has ten tines and they're pointed. it's used by farmers to move manure around. i use it to move mulch around, 'cause i can take this and in about four scoops i can fill the wheelbarrow. so if you bring that over there we'll get started mulching. great. now, another thing that happens people try to dump the mulch into the bed and two things can happen. number one, you can crush this nice edge that we made. number two, you dump too much mulch in and you end up piling it up again. so what i like to do is actually take it out of the wheelbarrow set
9:36 am
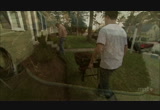
it in place, and then spread it out using little piles instead of big piles. you get that rake, you can start raking out these piles and, remember, i only want it an inch or two thick. no thicker than that. okay. roger, how close do i want to go to these shrubs? roger: now, around the plants, you don't have to push it all the way up under the plants. you want to just take and bring it to the drip line. you can do this by hand or you can do it with a rake but that way there we aren't getting mulch up against the branches or the trunk of anything. now, greg, along the edge we don't want to build the mulch up. if it's built up like this you can't keep it trimmed and the grass will grow in there. if you keep it down like we have there it's airspace, the grass can't grow in, and then you can just take your string trimmer and go right along the edge and keep that nice and neat, so take that little bit of mulch out of there. okay.
9:37 am

roger: now remember this plant? these branches were absolutely buried in mulch. now you can see the main trunk here and the branches are all lifted up out of the mulch. greg: will that make that plant flower more? absolutely, going forward, it will flower more. it's a much happier plant. all right, let's finish up with this tree. you want to give me a scoop in here? now what we're going to do is i'm going to take and just spread it really thin but we're not going to get any up against the trunk of the tree. we want to let that breathe. we're just going to put our inch coating out here where the roots are. can i help you spread it a little bit here? thank you, i appreciate that. it's looking good. much better than before. i love this brown mulch, too. this is my favorite. hostas are tough. they should be fine.
9:38 am
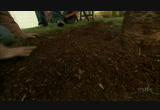
greg: okay. you got one more for me on the other side? sure. well, i think we're good. yeah, roger, it was a lot more work than i thought it was going to be but i know the plants are healthier and it looks a lot more cleaner for sure. roger: it looks great. hey, and one tip, next year, instead of ordering four yards of mulch, why don't you order just two? not a bad idea. thanks again for your help, roger. i really appreciate it. you're welcome. tom: all right, guys here we go. it's cone-shaped, it's red it has two circles on the top. it's soft, and, oh, yeah the giveaway there's two of 'em. what is it? kevin: that's not a giveaway! these are for your lawn art. what, like flamingoes? you don't have flamingoes, do you? i did, i got rid of 'em. i ate 'em. that's so cheesy! not much meat on 'em. these are for your gnomes in the front yard! "guh-nomes." no, gnomes. guh-nomes. gnomes! you know they go out at night chasing down the pixie dust and they lose a hat.
9:39 am
these are replacement hats huh? and they come in one color 'cause you only see the red guh-nome hat right? yeah, that's the right answer, yeah? guh-no, that's not the right answer. look, our healthcare program is pretty bare-bones. no professionals involved at all. now we can do exams ourselves. sit down up there. where are you going to put those? let me check your reflexes. ooh! hey, that works, huh? oh! not so bad. oh! oh! no let me give you an eye test. okay, good you're all set. lose some weight will ya? on the job site, i have to use these a lot. these are foam plugs for your ears to protect you against the noise from machinery. but what people don't realize is i really use these [loudly] so i don't have to listen to anybody! you know what i'm saying? but they don't understand 'cause they can't see these! so, what you do is you take these foam ones the big ones and you stick 'em in your ear! now this kind of says, "i don't want to listen to anything you're saying,
9:40 am

shut up!" you look like a guh-nome. give me that that's not it at all. and guh-nomes. where'd that come from? i don't know. all right, you guys all know that i have a boat and you always want to be safe on the water. you never know what's going to happen. i could be riding along and i could hit a rock. he's guh-noing down. now, i -- i got a hole and the water's coming in. you take these foam plugs, you squeeze 'em, and you push 'em in the hole and hopefully that will stop enough water so the pumps can keep up and i can get back to the dock safely. that's what you might use them for but i would rather use them to check richard's guh-noggin. [australian accent] g'day! man: this is our backyard. we love it out here, and we spend every single day during the summer out here. but my favorite area in the backyard is right over here. i absolutely love to grill. this is where i hang out most of my time out here. i cook chicken ribs, burgers, steak, everything you think of. the problem
9:41 am

with this grill is that i'm constantly running out of gas. i fill these tanks up every two weeks and i still run out of gas. i want to be able to cook out here all summer long and not have to worry about filling up those tanks of gas. hey, darren? hey, good morning. richard! look at you, you are a grillaholic. you're actually doing your breakfast, too? every chance i get i'm cooking on a grill. look at that. what strikes your fancy? i've got some sausage, some pancakes. you know what, i think i'll hold off and get a little work done first. it's time for someone like you to get rid of these propane tanks. i think we're going to switch you from propane to natural gas. all right. you already cook with it you already heat with it inside. we're going to run a new gas line inside here but we do have to double-check we have enough capacity at the meter. oh, okay. i know where that is. all right. all right, so we're at the front of your house. you can see the gas line that comes in from the street right here. there's a shut-off valve right here that they can lock if you don't pay your bill. gas comes up through this thing called
9:42 am

a meter bar right here. now, these are called out in numbers. there's a five light a ten light, a fifteen light back when houses used to have gas lights in them. now, you have electrical lights, right? yeah, electric. so the number that's more important to me is the meter number right here and that tells me you've got plenty of capacity. next i want to check what you've already got connected to this meter inside. okay. all right, darren, i think we got good news for you. i've mapped out all your appliances right here, and i now know that we have about 400,000 btus of capacity coming through this main line from the meter right outside. if you total up your gas furnace the water heater your gas dryer a fireplace right above us here, and a heater that you have above the garage it totals about 275,000 btus. we've got enough capacity. great news. all right? so the new gas grill wants to go right over here. here's where your patio is right here. so we need a place to be able to tie in to supply the gas lines so right here is a 3/4-inch
9:43 am
gas line which goes to that unit heater upstairs. it allows us to tap in right here, and because the gas grill is relatively close -- it's only about nine feet and nine feet -- we can actually run this smaller size black steel pipe. this is a steel pipe that's been cut and threaded and we'll be able to run this right along here to outside. now, this is not a do-it-yourself project. you need to be a licensed gas fitter, which i am so what i did is i brought along my best right-hand person, my son evan. evan, why don't you shut off that gas line, okay? all right, so we need to run our new gas line from right here to the gas grill location. now, there was a day that we would have cut and thread every single one of these pieces of pipe individually, but now we can buy them in pre-cut lengths -- six-foot, five-foot, four-foot, three-foot -- and then every single increment down in half-inch increments
9:44 am

actually down to one inch. here's all our parts and pieces. we're going to build it like an erector set. so now, with the gas off i can actually disconnect this drip cap right here. might be a little hiss. all right. oh, i can smell it. well, actually, you're not actually smelling the gas. you're actually smelling mercaptan something they add to the gas so you can detect a leak with your nose. now, all of our connections are going to have pipe joint compound applied to the threads. that's really important. we don't want any leaks. here's our new tee. i'm going to reuse this old drip piece. and one more set of threads right here.
9:45 am
so we'll use the same connection method all through our gas piping. apply the pipe joint compound and tighten up these threads with two wrenches. to support the pipe, i'm going to use threaded rod with galvanized hangars. now we can actually take our first measurement, and you see we need to allow for the threaded piece so that's a 4 1/2-inch piece, evan. all right, cool. going well. just grab me that wrench too, will ya? all right, so you can push that in.
9:46 am
i like to install a shut-off valve called a gas cut-off both inside and outside for safety. all right, darren, before we run any more pipe inside i've got to figure out where i'm actually piping to so i've got to drill a hole through your house. now, i have measured about four times from a reference point that tells me that right about here should be perfect for this way and i'm looking at 27 is what i think would be perfect so you feeling lucky? i'm feeling lucky. okay.
9:47 am
all right, so there is our hole. hey, right where i want it to be. that's pretty good. so now i'm going to stick this piece of pipe through as a gunner. let's take a measurement. what do you got? 60. nice. exactly 60? yep. ooh, boy. perfect. so it's a good practice to install this t-fitting right here with this leg right here with a cap. it's called a drip and that's to have a place to catch any rust or any water that might be in the gas so it could settle here and not block the pipe. all right, so i've got most of the connections done out here. here's a secondary shut off outside and this is actually a tester. i'm going to actually pump up all that new piping to about three pounds of pressure and close it off right there and see if it holds. inside i like to be double sure there's no leaks and do a soap test. if there's any leak, a big bubble will
9:48 am

show up. looks like we're good. all right, it's been about 40 minutes and our dial is right where it should be right at three. if there had been a leak that dial would have dropped and dropped and dropped and finally gone to zero. so now we can break this off. i'm going to install this fitting right here. it's pretty ingenious. it's actually a snap connector for your hose on your grill. pull this back the hose engages and locks in. it's only going to let gas come in if the hose is engaged. that's good for safety. absolutely. to make sure this steel pipe doesn't rust, it's good practice and code to spray paint it with a rust-proof paint. so what do you think? your new gas grill designed to burn with
9:49 am
natural gas this time. it has a hose in the back right here, and that is a connection made to snap right into here. all right, so just need to turn the gas back on and we'll be cooking. good deal. well, the gas is back on and you didn't waste a minute getting this thing fired up. we're up to, what, almost 600°? well, it's almost lunch time. how 'bout a hot dog? hot dog? well, you know what? i've been eyeing that pool. why don't you cook me a hot dog and send it to me out by the pool? thank you very much, richard. all right. mustard and relish. so, richard, he got himself a brand new grill, one that was set up to work with natural gas. you couldn't convert the old grill? most gas appliances, you can switch from propane to natural and natural to propane. what you have to do is change a thing called the orifice. if this was the tube coming down to the burner, down inside, there's this little, tiny part right here and this has the smallest of holes. they're different between natural and propane, so these have to be switched. but this guy was really hot for a brand-new grill, so he went out and got one, natural.
9:50 am
now, you needed a 60-inch length and you had a pipe that was 60 inches. i got really lucky. what do you do if it's 59? well, you build it -- 48 and the coupling and then ten and a half, so there was always two choices we had. one is to build it the way i did it there or the other was to bring 21 foot-long pieces of pipe, cut 'em on site, thread 'em using a thing called a power drive and a pipe die and we would cut these threads. i've seen it done many times on the job site. it's messy it's time-consuming, and it's expensive. it is expensive. i'm really excited about a new connection method. instead of having to cut these threads, this requires no threads. i measure the pipe where i want it, i cut it and here's the raw end and now what i want to do is to use this compression connection right here. you look inside, see that little yellow o-ring in there, the seal? that makes a seal that's tight against the outside of the pipe. there's barbed tabs right here. they're going to squeeze down over the pipe. so what you do is you want to prep this pipe. you use this deburring tool, and you'd spin it so it just took the edge off here. see the
9:51 am
sander in here? kevin: oh, yeah. so that would sand the outside until it looks like this and once you do, you bring it in like this. tommy, just grab that tool. this is a special tool that uses incredibly strong jaws. go ahead. [ whirring ] that connection's made and it'll never leak. i love that. isn't that something? tom: that's fast. all right. well, richard, you're always bringing us something new. try to. so, until next time, i'm kevin o'connor. i'm rich trethewey. i'm tom silva. and i'm roger cook. for "ask this old house." did i see that guy making pancakes on a grill? yeah, that's right. they must have been frozen. can you cook pancakes on propane? kevin: next time on "ask this old house"... i'm going to make some repairs to this cracked stone walkway. are we going to have to rip up the whole thing? no, we're just going to replace a few pieces. i'm going to show you how to use one of my favorite tools in my tool
9:52 am
belt, my trusty hand plane. a yellow semi-circle made of plastic. what is it? one pair of overalls a few cans of paint. add a dash of doing and mix together. that's a recipe for a kitchen you can't wait to cook in. the home depot is proud to support "ask this old house" and doers everywhere. angie's list, providing reviews of local roofers, plumbers dentists, and more written by people just like you, helping you find help when you need it. angie's list is a proud sponsor of "ask this old house." [ grunting ] man! what we need is some elbow grease. [ laughs ] yeah, you can -- are you kidding me? gmc -- lending "ask this old house" a helping hand since 2002. kevin: "ask this old house" has much more to show you. to see entire episodes
9:53 am

any time, just go to video.pbs.org. and like us on facebook. this old house magazine the companion to the television series, provides advice from our experts that you've come to know. you can use your credit card to order ten monthly issues for $10. just call... one tremendous thing about pbs is that it makes art accessible by putting it on a platform where millions of people can access it for free. and we need it. we need music, we need dance, we need great theater for our soul, for joy in our lives. a lot of people flip on pbs and hear or see something that wakes up that integral part of being a human being which is enjoying the arts of other human beings. so i'm grateful for pbs
9:54 am

as an artist and as a viewer. this old house books, including "salvage-style projects," are available in bookstores nationwide. "salvage-style projects" -- 22 ideas for turning salvage finds into stylish enhancements, step-by-step instruction and advice from "this old house." woman: well, here's a photograph of what it looked like before, when i first came to the site, and then as you can see, here we are now, almost completed construction. i'm stephanie hubbard, and i'm a landscape architect. when i first went to school, i was doing a dual major in environmental science and fine art. i was feeling a little torn between the two and feeling like i really had to make a decision so i remember talking to someone who introduced me to landscape architecture, and it was like an epiphany. the rest is history. so whenever i design a landscape i try to think of a series of spaces -- back there, that's the entryway, that's your entry experience. right
9:55 am
here, this is the first garden room, the outdoor room right in front of the front door. and then there's a connection to the wooded area beyond, through this walkway here. a landscape architect is a designer of the landscape meaning everything from the building face, out. it could include connections to the house terraces, open areas garden rooms, pergolas, walks, driveway alignment. you approach by car -- what do you see when you approach a site, what are your viewsheds? and then plants, of course. i love plants. i like taking very simple, expected materials that you see here in the new england landscape, and we're talking granite, bluestone fieldstone... and knitting these materials with maybe something a little bit more unexpected -- stainless steel, cor-ten or something like that. that's what makes a beautiful design. you know the stuff that you don't see is sometimes the most critical. the engineering of the soils and where the water goes and
9:56 am

how to make sure that, you know walls are installed correctly and will stand the test of time. it is a balance between the art of having things look seamless and elegant and have usable spaces but also melding that with sound construction and sound design from an engineering standpoint. be more -- pbs. pbs online...


2,583 Views
1 Favorite
IN COLLECTIONS
WJZ (CBS) Television Archive
  Television Archive News Search Service
Uploaded by TV Archive on
